
How to manage a client website project in Danto
Short answer
Create a Website project board and add one card per page or feature. Cards move through Discovery & content, Design and Build. When a page is ready, send it for client review with its preview link. Approved pages go Live.
1. Create a Website project board
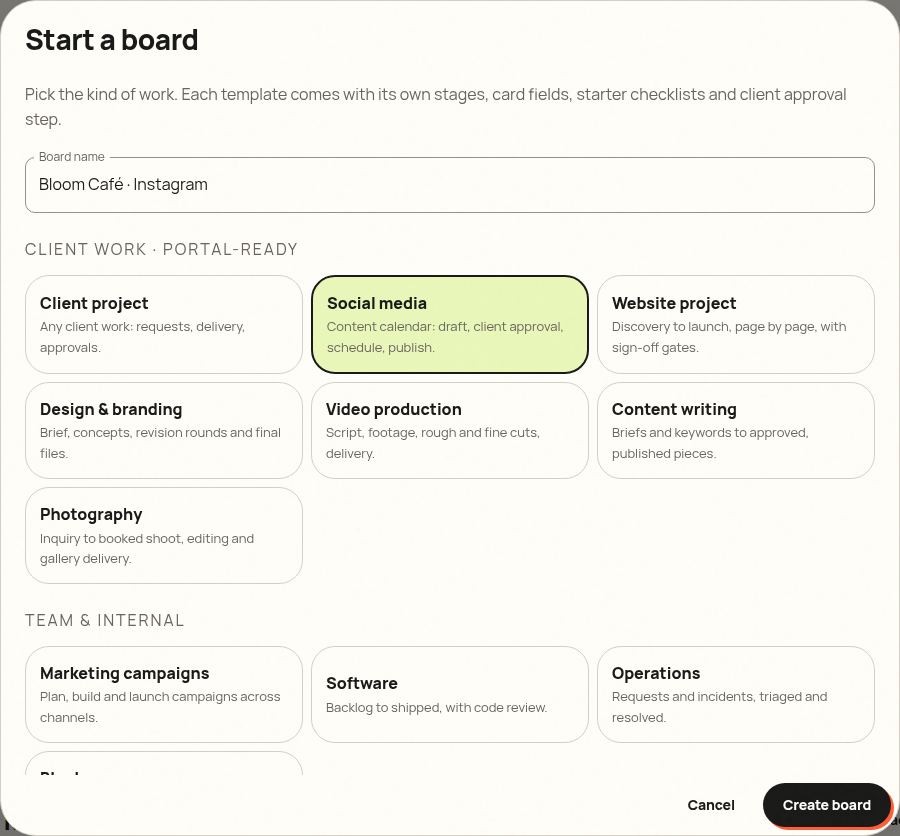
From your dashboard, click New board, name it after the client and project (for example “Northwind Dental · New website”), choose Website project and click Create board.
2. Know your stages
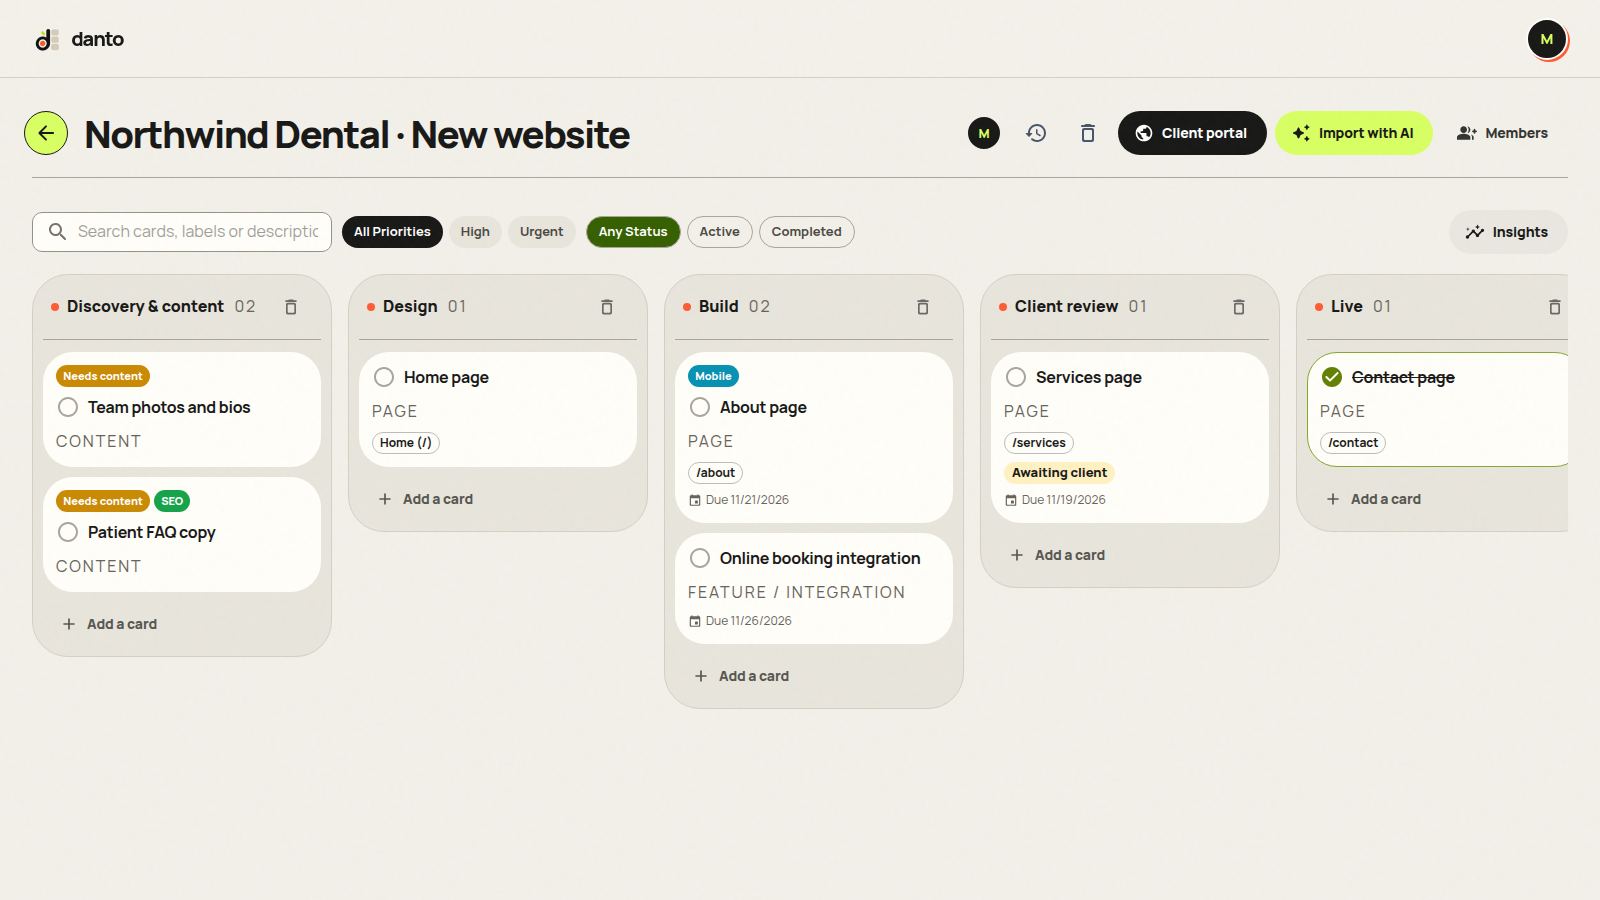
Treat each page as its own card. Clients sign off page by page instead of approving the whole site at the end, when changes cost the most.
- Discovery & content: content, photos and copy you need from the client
- Design: mockups in Figma or similar
- Build: development on staging
- Client review: the client checks the preview link
- Live: launched
3. Add pages and fill in the details
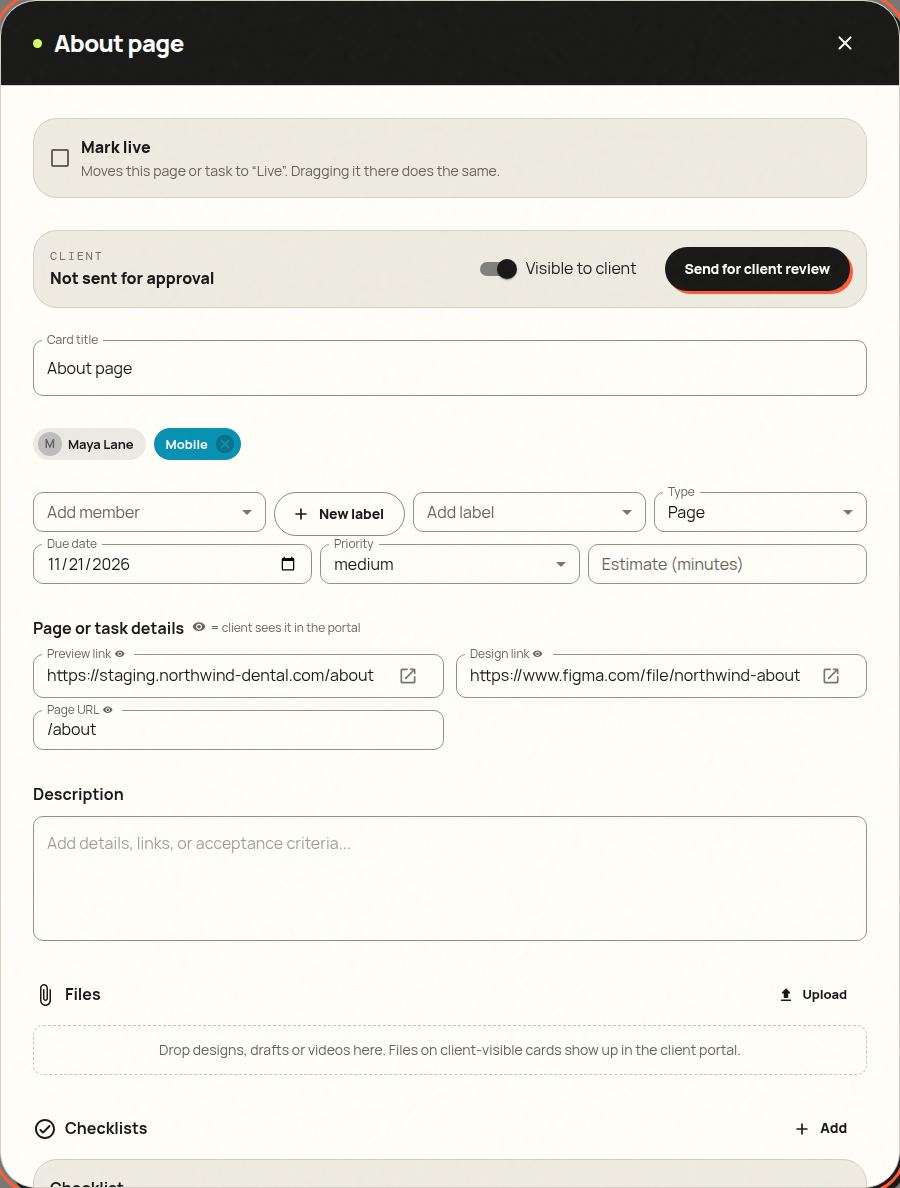
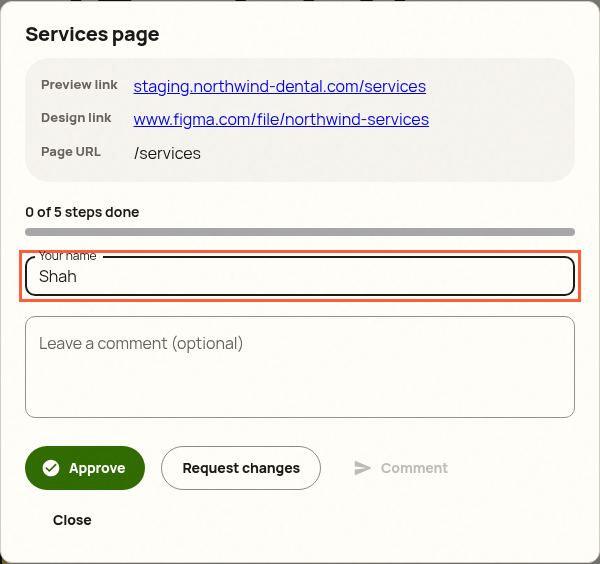
Click Add a card in any list. Choosing a type adds a starter checklist, and every card has a “Page details” section with fields made for this work. The client sees all three fields in the portal.
- Preview link: staging URL for the page
- Design link: the Figma or mockup file
- Page URL: for example /about
4. Send it to your client for approval
When a page is ready, open it, keep “Visible to client” on and click Send for client review. The card moves into the review stage and your client gets an email with a link. They don't need an account.
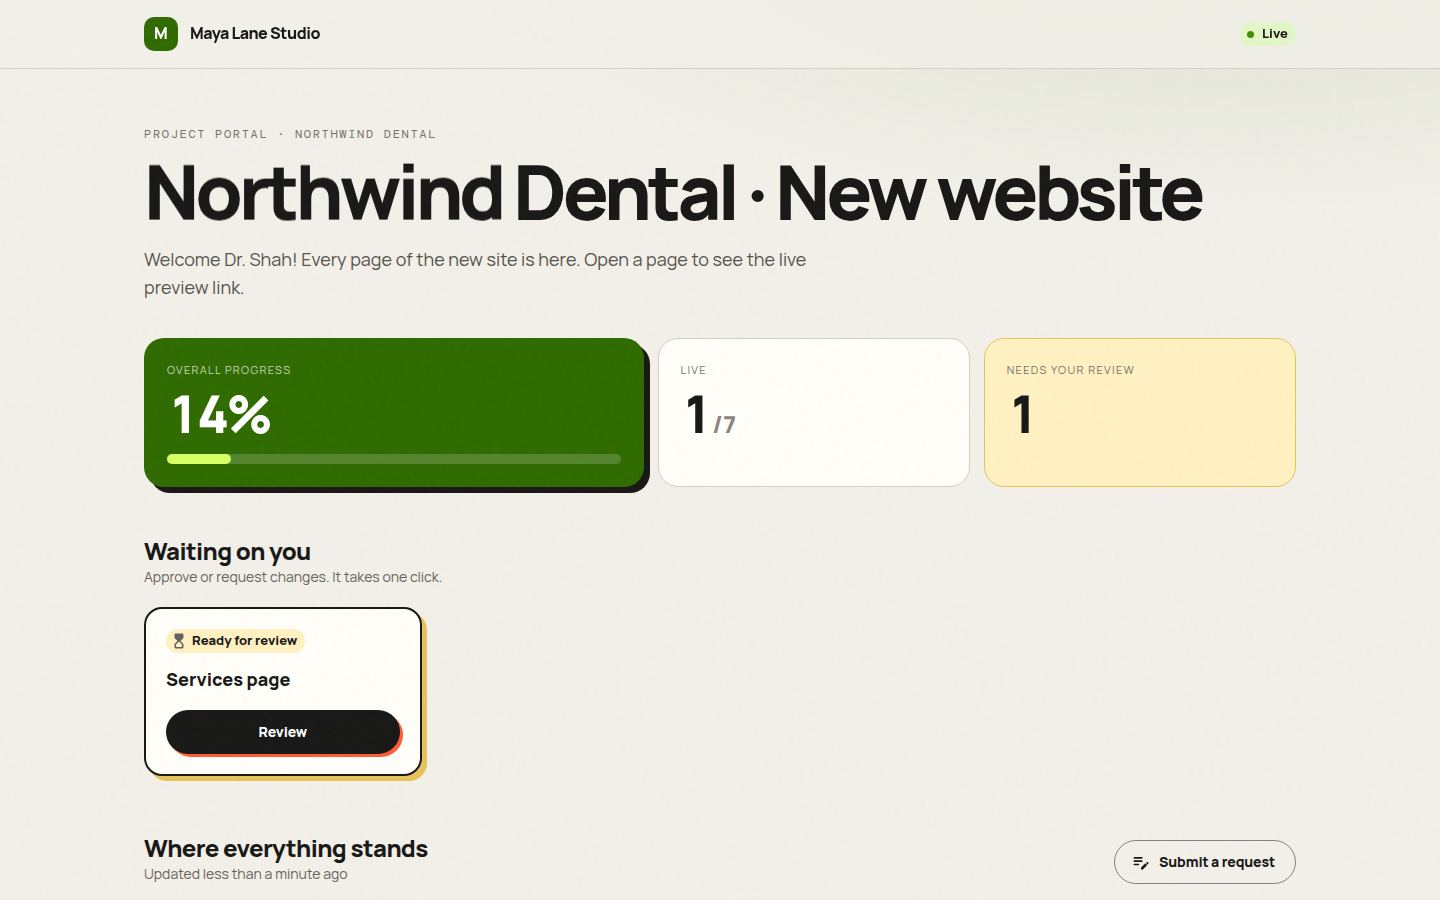
The portal shows every page and where it is, so the client can see the whole site come together without asking.
5. Your client approves or asks for changes
The client opens the page, sees the details you shared, and clicks Approve or Request changes. Approving moves the card to the next stage for you. Requesting changes sends it back to your working stage with their comment, so nothing gets lost in email threads.
6. Finish with “Mark live”
Drag the card into Live, or tick Mark live in the card. Both do the same thing: the card counts as finished, and the client's progress bar moves. If you drag it back out, it's reopened.
Starter checklists
These are added automatically when you pick the card type. Edit or delete steps freely, and your client sees progress (“3 of 5 steps done”) without seeing your internal notes.
- Page: content received, design approved, built and responsive, SEO title and meta description, tested on mobile and desktop
- Launch: domain and SSL, redirects from old URLs, analytics, forms tested, favicon and social preview image, speed check, backups
Tips from people who do this work
- Add a Launch card early. Its checklist catches the things that get forgotten on launch day.
- Use the Needs content label and keep those cards visible, so the client sees what's blocked on them.
- Ask for approval on the design before the build, not after.
Try it with your next client, free
Danto gives every client a live portal with one-click approvals and AI-written updates. One portal is free forever.
Create your free client portalFrequently asked questions
Will my client see everything on the board?
No. Clients see only cards with “Visible to client” on, and only fields marked with the eye icon. Internal pages, labels and comments stay private.
Should I make a card per page or per task?
Per page works best for client review, because the client approves pages. Use the Feature / integration and Fix types for work that isn't a page.